


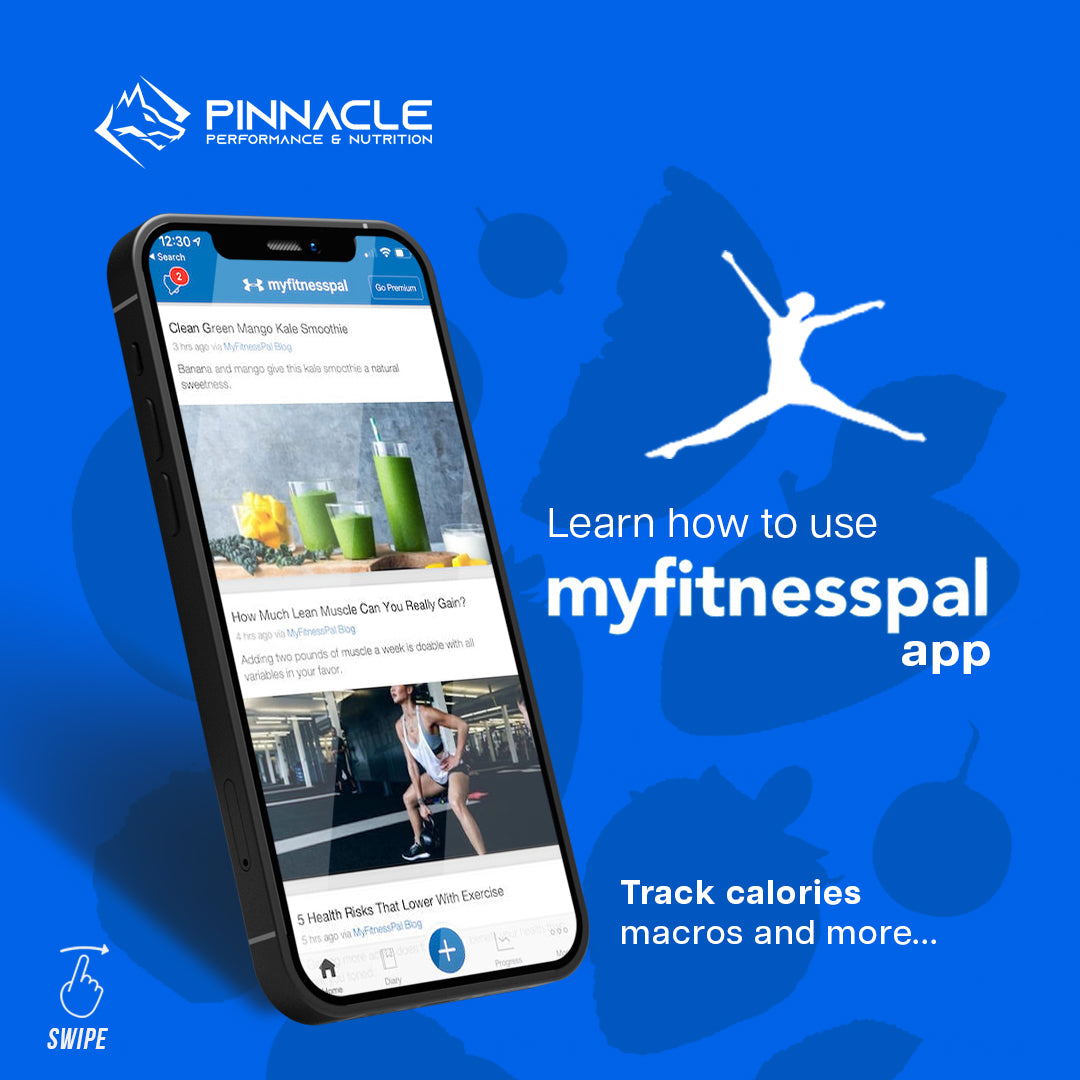
The Complete Guide to MyFitnessPal App

Tracking calories is one of the best and most effective ways to transform your body. MyFitnessPal is the most recommended app for people who want to track their calories effectively. When used correctly, it can help you to reach your goals faster and maintain them for a long time.
All you need is to download the free version of the app and read our guide to know how to use it correctly. The app and our guide will provide you with all the functionality and effectiveness you need.
Let’s get started.
Chapter 1: What Is MyFitnessPal?
- Download the App
MyFitnessPal app is available on both Android and iOS devices. Just search for MyFitnessPal in your app store or google play and download the app.
- Create Your MyFitnessPal Profile0
When you are about to create your MyFitnessPal profile, you have two options; you can either sign up with your email or continue with your Facebook account. It is up to you and does not matter either way. However, if you continued using Facebook, your account will be synced automatically with your Facebook. On the other hand, if you use your email, you can sync your MyFitnessPal account later.
- Input Your Starting Body Stats Into Your Account
During the setup process, the app will ask you about some personal information such as your name, fitness goal, date of birth, sex, height, weight, level of activity, and how quickly you want to lose weight, etc.
These details are necessary to create your account and to help the app to calculate your calories and macro targets.
Once you provide the app with this information, your profile will be ready. This does not mean that you cannot edit any information. You can edit your information at any time. There are different editing methods. You can click on the hamburger icon, the profile image in the top left-hand corner, or the pencil icon in the top right-hand corner to open the edit profile screen where you can edit any of your information in addition to adding a profile picture.
Notice that if you modified your height and weight, the app will automatically set calorie and macro goals.


You can try to add new weight figures by following these steps:
You can add new weight figures by clicking on the hamburger icon in the top left-hand corner and choosing progress from the drop-down menu. You will find a + icon in the top right-hand corner, which allows you to input new weight figures and progress pic if you want to. When you finish, click on the tick icon in the top right-hand corner.


- Input Calorie and Macro Targets Into Your Account
If you follow a specific fitness program or a nutrition plan or have a trainer, you will probably have calorie and macro goals, which may be different from what the app sets.
It is recommended to follow the specific goals that you have been set in your program or made by your trainer. You can ignore the goals set by MyFitnessPal and input your details manually:
- When you click on the hamburger icon in the top left-hand corner, choose goals from the drop-down menu.
- Under “Nutrition Goals”, choose “calorie, carbs, protein, and fat goals”.
- Now, you can input your calorie and macro goals.
- When you finish, click on the tick icon in the top right-hand corner.
The free version of MyFitnessPal allows you to input your macro goals as a percentage only and in 5% increments. Therefore, while changing the figures, you should be able to see the gram value. That is why you need to input the figures accurately. Even if it is not the exact gram value, it will be as close as possible.


- Add Your Friends and Personal Trainer
MyFitnessPal allows you to add your friends, which is great if you have friends who are also trying to transform their bodies. You can support and encourage each other to keep going until you reach your goals.
Besides, if you have a personal trainer, you can add him/her as a friend on the app and allow them to keep an eye on your food diary. This way, your trainer will be able to give you the help, guidance, and advice you need. The tips will be accurate since they are based on what exactly you are doing whether it is right or wrong and of course, he/she will be able to monitor your progress.
Some people do not like the idea of keeping their diaries visible to their personal trainers. Everybody makes mistakes at first and none follows the perfect diet from the first time. Your trainer will not make you feel bad or punish you. All he/she can do is to support and guide you and the only way to do so is when they can see your food diary and progress.
To add your friends on the app, click on the hamburger icon in the top left-hand corner and choose friends from the drop-down menu. Choose the plus friend icon in the top right-hand corner. Notice that you can connect via your Facebook account, contacts, or personal email.


To share your diary with your fitness trainer on MyFitnessPal, click on the hamburger icon in the top left-hand corner and choose “Privacy Center” from the drop-down menu. Click on “Sharing and Privacy Settings” and select “Diary Sharing”. You will be able to select from either “Private, Public, Friends, or Locked with a Key”.


- Track Everything You Consume Into the App
The main concept of using the MyFitnessPal app is to track everything you consume. The app makes the tracking process much easier since it provides you with multiple options to input the foods you consume along with a huge database of options. You can literally track everything you consume, foods and drinks.
To track everything you consume, follow these steps:
- Click on the + icon on the home screen in the bottom right-hand corner.
- Select food.
- Select the meal you will be taken to the food input menu.


Another way to track what you consume:
- Click on the hamburger icon in the top left-hand corner and choose “Diary” from the drop-down menu.
- Select “+Add Food” under the meal you want, and you will get taken to the food input menu for the desired meal.


On the input screen, there are many options you can use to input foods:
- The Barcode Option: In the top right-hand part of the screen, you can find the barcode icon. This icon allows you to scan the barcode of the package you will consume. It is a great way to save time since you do not have to input all the details.
- Search for Food: MyFitnessPal has a wide database of foods that you can search to input. The database is so wide and you will be surprised with the foods you can find there.
- The + Icon: Simply use the + Icon in the top right-hand corner and add the food you consumed manually.


It is highly recommended to use the barcode as long as this option is available.
Also, if you are going to use the database, keep in mind that it is open-source. Therefore, the information may be different from one person to another. To make sure that the figures are double-checked, always look for the green tick.
- Food Quantity on MyFitnessPal
When you select a certain food or use the barcode option to input your foods, you should provide the weight of the item in grams (in most cases). Therefore, you should know the exact weight of the food you are going to consume. If the item is 100 grams and you are going to consume all of it, then you know that you will input 100 grams.
The barcode option usually measures foods in grams and they will be displayed per 100 grams. If you want to change the inputs, you can use decimal figures. For example, instead of inputting 1.2 of 100 grams, input 120 grams. There is a table diagram you can check for reference.
- Customize The Names of Your Meals in MyFitnessPal
The app provides you with the option to customize the names of your meals and change how many meals you eat per day to be able to customize your whole day according to your personal preferences.
For Example, you can use the simple way (Breakfast – Lunch – Dinner) or customize it to be (Breakfast- Snack – Lunch – Snack – Dinner).
This is how you can customize the names of your meals:
- In the top left-hand corner, click on the hamburger icon, then choose “Diary” from the drop-down menu.
- In the top right-hand corner, you will find three dots, click on them and select “Diary Settings” from the drop-down menu.
- Choose “Customize Meal Names” and now, you can enter the names you want.
- Also, this screen allows you to edit “Diary Sharing” Settings.


- Monitor Your Progress With MyFitnessPal
After doing the previous steps, you can monitor your progress easily day by day with many different options.
The best and simplest way to monitor your progress is via the “Nutrition” menu. This menu has a blue progress bar showing each one of the macronutrients you consumed to be able to see how close or far you are from your goal, which macronutrients you usually consume, and which foods you need to consume more.
This screen also shows micronutrients. It helps you to see the full picture of your consumption of micronutrients such as fiber and sugar with the best target amount you should reach.
As you move forward, you should monitor and track two essential nutrition variables.
- Monitoring Nutrients in MyFitnessPal
- In the top left-hand corner, click on the hamburger icon and choose “Nutrition” from the drop-down menu.
- At the top of this screen, choose “Nutrients”.


You can also monitor your nutrients this way:
- In the top right-hand corner of the screen, select the pie chart icon from the diary page.
- At the top of the screen, choose “Nutrients”.


- Do Not Use MyFitnessPal to Track Your Exercise
People who use the free version of MyFitnessPal should not track their exercise in the app.
If you used the app to track your exercise, it will calculate the average number of calories you have burnt and add them to the total number of calories you are supposed to consume, which will make it difficult to track your calories and disturb all your figures.
Also, keep in mind that you have already set your daily calorie and macro numbers while creating your profile, which includes a calorie allowance for your training programs and exercises you do regularly.
In a nutshell, it is highly recommended to use MyFitnessPal as a way to track and monitor your nutrition only. This way, you will keep everything as simple as possible.
- Save Your Recipes, Food, and Meals to Your MyFitnessPal Profile
MyFitnessPal allows you to save your favorite recipes, foods, and meals to make it easier to track the foods you consume. This way, you will input your meals once and track them easily after that.
The foods you input in the app or scan using the barcode will be saved. They will show up automatically to you to be able to track your meals easily in the future.
For example, if you eat the same breakfast every day (coffee and porridge honey), you will have to input it for the first time and save it as a meal. The next day, you will just choose the meal and it will be tracked automatically.
Furthermore, if you have a favorite dish or a certain recipe that you make all the time, select “Recipes”, input all the ingredients you use under the recipe, and save it. Now, any time you make this dish, you can simply select it and it will be tracked automatically.
To add your recipes:
- In the top left-hand corner, select the hamburger icon and choose “Recipes, Meals & Foods” from the drop-down menu.
- Now, you can create your recipes using the recipe tab.
- You can create a meal using the meal tab or add food using the food tab.


- Use MyFitnessPal to Prepare and Plan Your Meals
Now, you have a good understanding of how MyFitnessPal works and how to use the free version effectively. Yet, it will take a while to get used to tracking everything you consume, which is totally normal.
After getting familiar with the app, you can use it to prepare and plan your meals instead of using it as only a tracker for your meals.
When you use MyFitnessPal is a food tracker, you try your best to adjust your meals to certain figures, which means that you are not really in control of what you eat. On the other hand, when you use it as a food planner, you control your meals completely. When done correctly, you can turn MyFitnessPal into a full-time nutritional planner for you.
Before going to bed, input your meals and foods. When you wake up, your entire day will be planned. Once your day of eating is over, you will hit your target macronutrients.
Also, you do not have to track your meals during the day since you have already inputted all of them the night before.
Some people use the app to pre-prepare their meals for their whole week and all of this because they input all the data in the app once and for all.
This is the longest chapter of this guide. Now, you understand how MyFitnessPal works completely and in the next chapter, we will talk about some other features that may help you to take your MyFitnessPal profile to a whole new level.
Chapter 2: How to Customize Your Macro Goals and Profiles?

Follow these steps to customize your macro goals and profiles in MyFitnessPal:
- In the bottom right-hand corner, select More from the home page of the app. Select Goals from the drop-down menu.
- Try to fill in your goals accurately; which include your Starting, Current, and Goal Weight in addition to your Activity Level and Weekly Goal.
- Determine your Calorie and Macronutrients Goals under Nutrition Goals. Select the “Calories” Section and customize your calories. After that, select “Check” to save your goals.
- Notice that under the “Calories”, you will find the macro headings “Carbohydrates, Protein, and Fat”. You can change the macro numbers by selecting a heading. A percentages wheel equaling 100 will appear and you can customize it as you want.
- Notice that if you will use the free version of the app, you will not be allowed to add specific numbers of grams.
- You can make adjustments as you need to make your macro goals as close as possible as you really want.
- The percentage will be highlighted in red and not equal to 100% and you may not be able to save your macros.
- You need to adjust the wheel to equal 100% to be as close as your macros.
Choose “Check” to save your macros. - To customize your micronutrients, go back to the Goals page and select the Nutrition Goals. Choose Additional Micronutrient Goals and input your micronutrients in numbers and click on Check to save.
Now, you have customized your macro and micro goals and they are saved to the app.
Here is how you can do it by pictures.


Chapter 3: How to Customize Your Macro Goals In MyFitnessPal Premium?

If you want to take your MyFitnessPal Experience to the next level, you should try Premium MyFitnessPal. One of the most amazing features of premium MyFitnessPal is that you can customize your macronutrients in numbers and make them more specific, which is absolutely better than the percentage wheel in the free version of the app.
When you look at your daily macros, the information will be 100% accurate. In this section, we will show you how to customize your specific macronutrients using premium MyFitnessPal.
- In the bottom right-hand corner of the Home or Food Diary Page, select the three dots (…). Then select Goals.
- On the Goals Page, select Calorie and Macronutrient Goals.
- Now, you can choose each macronutrient you want and update it once and for all. Once you enter this macro, the calories will be updated automatically.
- Once you are done. A clicker wheel will appear. This wheel will help you to set your goals into grams and allow you to make adjustments in 1 gram increments.
- Save your macronutrients by clicking check. Now, your macro goals for each day will be close to your goals and more accurate than the free version of the app.
Chapter 4: How to Check Your Macros and Micros?
To check your macros and micros, follow these steps:
- Select Diary from the Homepage bottom left navigation bar.
- Go to the bottom of the food diary page and choose Nutrition.
- You will find Macros, Nutrients, or Calories at the top of the Nutrition Page.
- Macros will allow you to display all the macronutrients you take as a pie chart and also in the exact grams you consume.
- The Nutrients section will help you to show all the macronutrients you take as a bar graph with total grams, your goal, and the number of grams you need to consume.
- The Calories section will help you to display your calorie intake as a pie chart and in the total calories you consume per meal.
Alternatively, you can check your macros and micros using another way.
- Select More (…) from the home page bottom left navigation bar.
- Then, select the Nutrition five option down to view all the previous pages where you can check your macro, micro, and calorie intakes.
Here is how you can do it by pictures.


Chapter 5: How to Log Meals?
To log meals in MyFitnessPal, follow these steps:
- Select Diary from the bottom left navigation bar on the home screen of the app.
- Now, this is your food diary. You can use it to log all your individual food items into each mealtime including snacks.
- Under any of the meals, you will find the +Add Food button where you can add any food you consume into a mealtime.
- If you are using the app for the first time, your food database will be empty. There are no recent, frequent, or saved recipes or meals yet.
- At the top of the Add Food Page, there is a search bar in the top where you can search for foods and start adding your meals and recipes.
- Input all the details you can in the name of the meal you are adding to the app. For example, use brand names, raw or cooked, skin or off, etc. Then choose Search.
- When you click search, you will find a list of the results. Go through the list to find the best match and select it by tapping on it.
- You can log the specific serving sizes and amounts. After that, click Check to save this item to your food diary.
- There are some items verified by MyFitnessPal. These items appear in the search results with a green check next to them. This means that the app has checked this item and, in most cases, it is the closest match in your search results.
Repeat the previous steps when you are about to log a new food item. Of course, you can add as many foods and meals as you want.
Also, if you want to delete an item, just swipe across its name entry and it will be deleted.


Now, here is how to log a recent meal.
- If you had the exact same meal you had yesterday, you can go to the meal heading and select +Add Food.
- Scroll through the first list of foods that appear under “Recent” in the top navigation bar and you can view foot items that you recently consumed.
- Select this item if you are going to have it. Also, you can update the serving size.

Now, let’s see how to save a meal for future use.
- Now, you have a food diary in MyFitnessPal and you can scroll through it and find any meal you want,
- At the bottom of the list of foods for a certain meal, tap on the three dots (…).
- Now, a menu will appear with three options. Choose “Save as Meal”.
- It is recommended to give your meals certain names and then select Check in the tip right corner to save it to your database of Meals in MyFitnessPal.


Now, let’s see how to add a previously saved meal to the food diary.
- Under the mealtime, select “+Add Food”.
- On the Add Food Page, you can find “Meals” second from the right across the top navigation bar.
- From the list that will appear, you can choose the saved meal you want to track.
- You can delete any ingredient or meal you want by clicking on Edit and then Remove. Now, your saved meal will not include the item you deleted.
- Click on “Check” and now the meal is logged and will appear in your food diary. Of course, you can change the serving sizes and quantities if you want.


Chapter 5: How to Add Bulk MyFitnessPal Recipes and Log a Single Serving?

Some people ask how they can add bulk recipes to their MyFitnessPal accounts and log a single serving. Busy people usually save a lot of time by cooking recipes in bulk. These people need to be as organized as possible and do their best to prepare their meals ahead of time.
If you know MyFitnessPal well, it will provide you with great ways to make tracking macros, bulk recipes, and their portions easier to save a lot of time.
This section will show you exactly how to input a bulk recipe into your MyFitnessPal profile in addition to using it to track individual portions of this recipe when you need to.
This is amazing since you do not need to split your recipes evenly to ensure that what each portion contains. For example, you may want 400 grams of a certain meal now but the next day, you may want just 250 grams.
Here is how it is done.
- Select More, then Meals, Recipes, and Foods, and Create a New Recipe after that.
- Choose Enter Ingredients Manually. Now, in the Recipe Formation section, give a name to your recipe and set the serving size to 1.
- In the top right corner, you will find an arrow which you should select to move to the next steps.
- When you click on Add Ingredients, you will be taken to the app database where you can search for certain ingredients.
- In the ingredients database, input each ingredient, its volume, and quantity.
- MyFitnessPal contains some wrong listings. Therefore, you need to make sure that each ingredient you input is in the right brand, product, and food type. Double-check to make sure that the Information page of the ingredient looks right.
- Select Calories Per Serving bar once you are satisfied with your list of ingredients and have made sure that everything you have entered is correct. At the bottom of the ingredients page, you will find the number of calories. For example, 689 calories per serving as you see in this example.
- Make sure that the servings are all set to 1.
- On the right corner of the servings page, tap on “Check” to close and go back to the Add Ingredients page. Now, select the arrow in the top right corner.
Now, you can see in this example of slow cooker chicken soup that we have completed all the previous steps and the app took us to the Save Recipe Page.
MyFitnessPal will provide you with a list of nutritional facts including the macronutrients for the whole serving.
Also, you can find out the exact grams of the macronutrients of the recipe to measure out its specific amounts and log them in your diary.
Before moving on, it is highly recommended to check the nutritional facts of the whole recipe and make sure it looks right.
Follow the following steps to make sure that the process is done correctly.
- After finishing cooking your recipe, it is recommended to weigh the finished meal. If the final product is large, you can weigh it using two or more separate bowls. It is important to get the final quantity right.
- Change the serving size from 1 to the exact numbers of grams on the Save Recipe page.
- After updating the grams of the recipe, the nutritional facts will change. Depending on the recipe, they will display the correct nutritional facts of the macronutrients for each gram of the recipe.
- Go to the bottom of the save recipe page and choose “Save”.
- Now, you can serve up a certain portion of the recipe. You can log a single serving of a certain number of grams that you want. Just open the Food Diary and select mealtime.
- In the Food Diary, choose Recipes in the top right corner. You will find a listing of your personal recipes. Choose the recipe you want to track a single portion of and the app will take you to the Add Food page.
- On this page, the recipe serving size will be shown as 1 serving(s), which means 1 gram. Now, you can input the exact grams of the portion you want to enter. Now, choose “Check” in the top right corner to save and enter the meal in your food diary.
Here is how you can do it by pictures.


Chapter 6: How to “Quick Add” Macros to Your Diary?

In some cases, the macros of a certain food item are well-known, and we added them manually to MyFitnessPal, it would be faster and easier instead of searching the database of the app.
MyFitnessPal premium allows its users to manually add the macros of a certain food product to your diary to make it easier to track your meals.
Here is how to add the macros faster.
- Open the Diary page and select the three dots (…) in the bottom right corner of the meal you want to add the macros quickly to it.
- Choose Quick add from the pop-up menu that will appear.
- On the Quick Add page, you can type in the macros you want to add to your Food Diary. Once you input the macros, the calories will be calculated for you.
- In the top right corner, choose “Check” to save.
Now, your Food Diary will include the new calories and macros.
Here is how to do it by pictures.


Chapter 7: Custom Food

There are usually two options when you log food into MyFitnessPal. The first option is that the food you want to track does not exist in the MyFitnessPal database or you are going to add the food you created such as a dressing or sauce.
Adding the macros by yourself takes no time. Of course, you need to have the nutrition facts of the food item first.
Also, if you have created a certain food item and you do not really know its macronutrients, it is recommended to add it as a recipe.
Follow these steps.
- Select More from the home screen of the app in the bottom right-hand corner menu bar and then choose Meals, Recipes & Foods.
- In the top menu bar, choose Foods. At the bottom of the Foods page, you will find a button “Create a New Food”.
- Make the food item ready and prepare all the nutritional facts. Check the pictures in this section to make sure you follow the exact steps.
- If applicable, input the name of the brand and description on the Create Food Page. You can input the serving size and servings per container using the nutrition facts label.
- If you are in the Weight Against Gravity (WAG) program, you know that using the weight of your foods is better than measuring their volume. Therefore, you should always input the grams as the serving size.
For example, if the serving size is 66 grams, you should enter the 66 grams serving size.
You do not have to calculate anything, and you are not restricted to the recommended serving size on the food label since the app does everything including calculating the macros per gram of the food item.
After that, the app will calculate a 1 gram serving size option for you when you input the food into your food diary.
Once you are done, choose the arrow in the top right corner. - Complete the rest of the Create Food Page by using the Nutrition Facts label. Try to include the information you can about the macronutrients (Carbohydrates, Fat, and Protein). You can also include Fiber as a micronutrient.
If any macro or micronutrient has 0, leave it blank or input 0. Click on check in the top right corner to save the food to your MyFitnessPal database.
Note that it is optional to input all the micronutrients. - Now, the app will take you to your Foods database and ask you whether you want to log it later or enter it into your food diary immediately. The new item now is in your Foods database.
- To input the food you have just created into your daily meal log, go to the Diary Page in the bottom left of the home screen navigation bar.
- Choose the mealtime that you want to add the food item to and select +Add Food. Go to My Foods from the center of the top navigation panel and choose your custom food from your database. Also, you can select the serving size and change it as you want.
You can input the exact number of servings you want to track in grams.
You can view the macronutrients update now to exactly match your entry.
After finishing, choose “Check” in the top right corner to add the food item to your food diary.
Now, you can see the food logged in your MyFitnessPal database.
Here is how you can do it by pictures.


Chapter 8: How to Set Different Macros for Different Days in MyFitnessPal Premium?

In the premium version of MyFitnessPal, you can set different macros for different days. Therefore, for example, if you have higher or lower protein days, you can set them in the premium version earlier.
Follow these steps to set different macros for different days.
- In the bottom right-hand corner of the home screen or the Food Diary page, select (…). Then, select goals. After that, select Calorie & Macronutrient Goals.
- On the Calorie and Macronutrient Goals, select Add Daily Goal. The app will now take you to the Add Custom Goals Page where you can choose the day or days of the week when you want to change your macros.
- Now, to update your macronutrients to be as specific as you want for certain days, use the Clicker Wheel and then select Check to save it.
- Now, go back to the Food Diary page and scroll to the day or days you just updated and you will see that your macronutrients have been updated.
Here is how you can do it by pictures.


Chapter 9: Final Thoughts

MyFitnessPal is one of the most important tools that can change your life completely if you used it correctly and learn everything about it.
Tracking your calories is essential if you want to lose weight and build your body correctly. Weight loss is challenging and becoming calorie deficient is a long journey.
MyFitnessPal has a great reputation and comes with amazing ways and systems that help you to track everything you consume easily. It also has a massive food database that can be used to track all your meals and calories.
If you are willing to track your daily foods including the three main meals, any snacks you consume, your workout details, and any other related details, then MyFitnessPal will help you to stay aware of all the details of your consumptions to be able to lose weight eventually.
The app is designed to help you reach a calories deficit status in order to lose weight. When your total calories that are set by MyFitnessPal are lower than what your body needs to maintain your current weight, your body will start to burn fat and consume more of its stored calories, which is the only way to lose weight.
The app will help you to maintain the calorie deficient status every day and in a few days, you will start noticing results.
I hope this guide helps you in your weight loss and bodybuilding journey.

1 comment
Online Casino
Hi there, just became alert to yor blog through Google, and found that
it is really informative. I’mgoing to watch out for brussels.
I will appreciate if you continue this in future. Lots oof pople will be benefited from your writing.
Cheers! https://Vavadaonlinecasino.evenweb.com/
Leave a comment
This site is protected by hCaptcha and the hCaptcha Privacy Policy and Terms of Service apply.